


Ladies - to keep your vote, get your passport
Fees can be waived if money is an issue

As many of you are aware, the GOP is trying to pass a bunch of laws to limit voting under pretense of making sure only citizens can vote. To be clear, that’s already the law, there’s no valid reason to pass any additional “just to be sure” laws. These new laws are written to deliberately prevent certain demographics from being able to vote.
The most recent, and most likely one to get through, is the SAVE Act. This will prevent most people who’ve changed their names (I’m looking at you my fellow married women) from being able to cast a ballot by requiring you show proof of citizenship and ID when you vote. This act will also make it impossible to continue mail-in voting by requiring you to present this proof when you vote, but that’s not what we’re focusing on at the moment.
So, what’s a lady to do? You go and get your passport, that’s what you do. “But I can’t afford that!” you say. “You can get the largest part of the fee waived” I reply.
Oh? Is the money the excuse your bestie keeps giving you? You don’t even have to read the rest of this, just forward it to them right this minute and then come back, I’ll still be here with instructions on how to do all this. Here’s the link about the fee waiver - https://www.uscis.gov/i-912.

Ok, you back? This waiver is for the fee charged by the US Department of State. You will still need pay the processing fee of $35, and there may be fees associated with gathering your documents and getting your photos.
First my disclosure - I used to work in city hall and one of my tasks was as a back up to the passport agent. This means that processing passports was a part of my job, it was not my main job. I stopped processing passports the summer of 2021. Therefore I cannot offer you information in any sort of official capacity, and my knowledge may be slightly out of date. So consider me your pretty knowledgeable buddy who can answer most of your questions, or at least point you in the right direction for finding the correct answer from a better source than my memory.
The source of truth for any question is travel.state.gov. If I tell you one thing and that site tells you something different, go with what the site says. I’m also not going to offer an exhaustive list of options for paperwork, I’m just going to give an overview that will be enough to get most people through the process.
Unsorted random things to know -
I’m only going to talk about getting a passport for an adult. Under 18 adds a bunch of complicating factors that I don’t want to dive into and the purpose of this is to make sure you can still vote.
There will be 2 payments. The first is for the acceptance facility and will be $35. You can generally pay that one with cash, check, or charge. The second will be for the US Department of State and the cost will depend on a variety of factors. This payment has to be something that can be stapled to your application - so check, money order, travelers check, etc. BRING YOUR CHECKBOOK and please don’t use the starter checks from the bank that don’t have your name on them.
I really recommend not writing the check until you are with the agent. You may change your mind about what you want, and many people write the check out to the wrong place. But if you do want to pre-write the check, make it out to the US Department of State.
Do not use any of those services that will charge you $100 to hand deliver your application on your behalf. They literally just walk it over to the post office when that’s exactly what the agent will also do at the end of the evening. They are a scam, we have to fill out extra paperwork, and they do nothing but take your money for a service you don’t need, and there’s a possibility that they are going to just steal your paperwork.
The first time you get a passport (or if your last one was issued when you were a minor, or yours is expired beyond 5 years), you have to apply in person and go through the interview with the agent. Please be friendly. A lot of people are really mean to the agents.
Do not cover up any mistakes on your application. Don’t scribble it out or use white out. Draw a single line through the error and write the correction above it.
Use black pen if filling out a paper application.
If you fill it out online and print a copy to take to your interview, you might have to redo it on a paper application there. The agent isn’t being a jerk if they make you do this. The forms often print with the wrong margins which screws up the spacing and the machines can’t read it. This was a flaw with the website that I hope is fixed by now.
Step 1 - Find a local passport acceptance facility
https://iafdb.travel.state.gov/
People way say the post office, city hall, the library. Any of those might also be an acceptance facility, but it might not. So find one and then call them. Yes, call them. Ask them their hours and how to make an appointment. Some will be walk-in only, some will be appointment only, some will open up appointments at a certain time each week and when they fill up, they close the appointment form until next week. Also ask if they do passport photos or if you need to bring them with you. If you need to bring them, ask the agent where to go. Trust me on that one. We had 1 place within a 10 mile radius that did them correctly and the rest of them always got rejected.
If it is walk-in only, go EARLY. It’s worth taking an hour or two off work to be one of the first people in the morning. On days that there is no school, don’t even bother. The place is going to be full of annoyed kids and you may get sent away after waiting a long time if things run long with the people ahead of you.
If there is anything out of the ordinary about your life history that would affect your ability to document your citizenship and identity, this phone call is an opportunity to ask the agents what you will need to bring with you. One thing agents really hate is getting 90% through your application, finding you don’t have something that’s required, and having to end the appointment without completing it. They would prefer to spend 5 minutes on the phone with you before you show up to make sure you have everything.
Step 2 - Gather original documents or certified copies
Photocopies will be rejected - they must have the official stamp or embossment from the issuing agency. Leave your social security card at home, it does nothing for you.
The agent needs to collect the documentation to prove that the applicant is a citizen, and that the person in the room with them is that applicant.
The most straight forward application is going to end up being a total of 4 pieces of paper - the first page of the application form, proof of citizenship, photocopy of ID, last page of application form. More complicated applications can end up being a ton of paper.
Most common forms of proof of citizenship - Birth Certificate, Certificate of Naturalization (if it includes a recent photo it can also be your ID), previous passport (expired is still valid as proof of citizenship)
Less common - Consular Report of Birth Abroad or Certificate of Birth, Certificate of Citizenship
Common forms of Valid ID - Drivers license, State issued ID card, Military ID card
Step 2 - Potential complications
If your ID has been issued within the last 12 months, bring a second form of ID. This does not have to fit the stringent guidelines of the official ID your submitting, it’s there to support that your official ID is real. So a student ID card, a work badge with your name and photo and date of issue on it, something like that. If you don’t have a second photo ID, they may accept a credit card that has your name and issuing date on it. They will block out the card number before photocopying it.
Name Changes - This is where things can get messy.
If you changed your name when you got married, you will need to submit your original marriage certificate.
If you then got divorced, you will need the official divorce decree. Hopefully that will include verbiage saying you are changing your name back from your married name.
If you went to court to change your name, you’ll need that document.
Step 3 - Passport Photos
https://travel.state.gov/content/travel/en/passports/how-apply/photos.html
Highly recommend clicking on the link and going through the examples. Click on the yellow menu items for each topic. I’m deliberately choosing to screen capture the example of the hijab in case that’s gone tomorrow.

If you’re lucky, the passport acceptance facility also takes photos. Many of them don’t, so make sure you find out before you go.
Many drug stores or copy shops do them. And many of them do them badly. If the first thing the agent does is ask to see your picture, it’s because they know that certain places in the area always do them badly and they get rejected.
Nothing big in the hair like a bow.If you can wear your hair off your face like in a bun or a ponytail, do that. Just make sure you don’t have some weird section of bun that sticks out like a tumor on the side of your head. A computer will be looking for facial features in this photo, so the full outline of your head needs to be visible.
Pure white background - but do not allow them to digitally alter it to create a clean background. If it’s so clean that it was clearly photoshopped to be that way, we have to reject it. Any alteration is an automatic rejection - do not let the dude bro thinking he’s got mad photoshop skills tell you any different. Make them do it again and leave it unaltered.
Step 4 - The application
When I last did them, the paper ones were 2 pages plus a third sheet of instructions. I’m assuming this hasn’t changed.
Fill out the top portion. Print - not cursive.
The choices you make in the top white portion will affect the fees. Discuss the options with the agent if you need help deciding what to get.
The book is your traditional passport and is good for all travel. The card is the same format as a drivers license and allows you to cross borders by car or by boat. The card does not allow you to travel internationally by plane. Both options are complete proof of citizenship and current photo ID.
DO NOT TOUCH THE WHITE BOTTOM HALF OF THIS PAGE - that has to be done by the agent. If there are any marks in this section, they will have to make you fill out a new one.
Do not staple your photo as a favor to the agent. I can almost guarantee you’ll do it wrong and then they’ll have to try to undo it and redo it without leaving any holes in the picture.
For anything that does not apply to you, write “N/A” in the box. Don’t leave it blank. Acknowledge all boxes. If your address does not take up 2 lines, draw a single line all the way through the “address line 2” boxes.

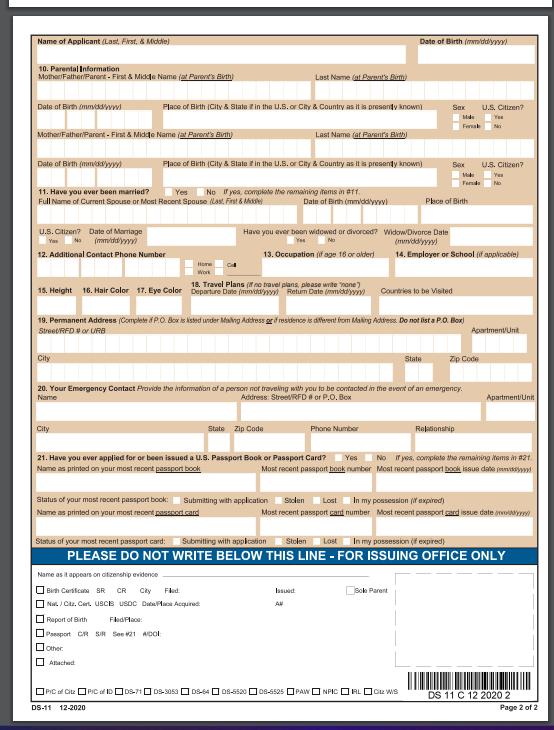
Page 2 is where people miss things.
The first thing we look at is did you fill out your parents information? You will need to know your parents birthdate, birth place, and the name as it appears on their birth certificates. So this is a good opportunity to call your mother because she worries! And you may not know where she was born, but you'll need that info.
If you’ve never been married, write “N/A” in name of current spouse and a single line through other white boxes offered.
Additional contact - work phone, spouses phone, etc.
Occupation - if you are retired, then “retired” is your occupation and your last place of employment is your employer. If you are a homemaker, you can put “home” as your employer. Funny side note - we have to enter something in that field for everybody, so “baby” is an occupation.
Permanent address - if the same as on the first page, write “Same”.
Emergency contact - they want someone who is unlikely to be traveling with you such as a living parent, adult child, friendly neighbor, etc. The purpose of that field is so that if you go missing, or if there’s a tragedy abroad, they will have someone they can contact back home. Odds are you’ll be travelling with your spouse, so they’ll be missing right along with you making them a bad choice for your emergency contact.
If you have ever had a passport before, you will need to surrender it to be submitted with your application.
Out of the ordinary situations - I can guarantee you, there’s a form for that. You had a passport 50 years ago and have no idea where it is? There’s a form for that. You had to bring an interpreter with you? There’s a form for that. Your current passport burned in a fire or drowned in a flood? There’s a form and a fee waiver for that.
Whew! I think this might be my longest post yet. The guide for passport agents that goes over every possible situation is about the size of an old timey phone book. But hopefully the info here is enough to get most people through the process relatively untraumatized. I will do my best to answer questions in the comments, or offer some places to look for the answers if I don’t have them.
If you have a question you don’t feel comfortable throwing out there in public, go ahead and click that button to message me and I’ll do my best to offer some advice.
Hi, thanks for all the info, and I do have a question. Am I correct in thinking that what married women who have taken the names of their spouse (I guess that would apply to men who have done the same) need their marriage *license* and not their marriage certificate? I'm almost sure that the latter is what I took in to get my DL with a star, and even though I had a fistful of other documents, they told me they couldn't do it. I believe I took in what the minister signed at the church, and they wanted some legal form from the state. I hope I remember where I put all of those papers.
Also, do they return the birth certificate? Given the current state of federal employees being given the boot for no reason and the skullduggery going on around and after that, I'm a bit leery of turning over a document like that, not knowing in whose hands it may end up.